A bit of colour to lighten the mood on an otherwise black and white blog...
Processing
Now we had to put all the images in processing, the initial processing code was too graphic intensive for the computer to handle, so we had to reduce the quality slightly, here's the final code...
import ddf.minim.*;
import processing.opengl.*;
Minim minim;
AudioInput in;
//sets a name for all the images
PImage a;
PImage b;
PImage c;
PImage d;
PImage e;
PImage f;
PImage g;
PImage h;
float audinL;
float audinR;
float audin;
int audinInt;
int audinAvg;
int audinCount;
int samplecount = 1;
void setup()
{
size(1000, 679, P2D);
//defines the size of the screen and the graphic format;
minim = new Minim(this);
//loads all the images
a = loadImage("a.jpg");
b = loadImage("b.jpg");
c = loadImage("c.jpg");
d = loadImage("d.jpg");
e = loadImage("e.jpg");
f = loadImage("f.jpg");
g = loadImage("g.jpg");
h = loadImage("h.jpg");
// get a stereo line-in: sample buffer length of 512
// default sample rate is 44100, default bit depth is 16
in = minim.getLineIn(Minim.STEREO, 512);
textFont(createFont("SanSerif", 12));
stroke(255);
}
void draw()
{
background(0);
//text("Listening to current sound input", 5, 15);
// draw the left and right audio levels
// values returned by left.get() and right.get() will be between -1 and 1,
// so we need to scale them up to see the waveform
for(int i = 0; i < in.bufferSize() - 1; i++) { // this line below gets the level of the left channel audinL = in.left.get(i)*10000; // right channel audinR = in.right.get(i)*10000; // average of the two channels audin = (audinL + audinR) / 2; if(audin < 0) { audin = -audin; } audinInt = int(audin); audinCount = audinCount + audinInt; samplecount ++; // only check values after 10 samples if (samplecount == 10) { samplecount = 1; audinAvg = audinCount / 10; println(audinAvg); audinCount = 0; // if statements to change image depending on level if (audinAvg > 2000) {
background(a);
}
else if (audinAvg > 2100) {
background(b);
}
else if (audinAvg > 1800) {
background(c);
}
else if (audinAvg > 1500) {
background(d);
}
else if (audinAvg > 1200) {
background(e);
}
else if (audinAvg > 900) {
background(f);
}
else if (audinAvg > 600) {
background(g);
}
else {
background(h);
}
}
}
}
void stop()
{
// always close Minim audio classes when you are done with them
in.close();
minim.stop();
super.stop();
}
Trelick In 3D
After editing all the images we had to merge them together in photoshop converting one to red and one to cyan, we did this through the blending options, turning the red channel off.


Photoshop
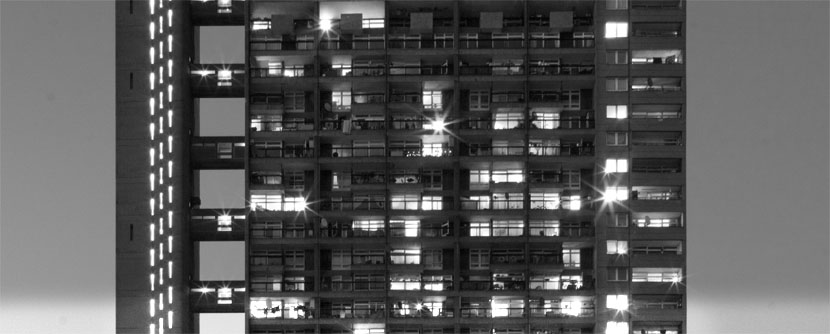
We burned out the lights on photoshop of each level to then be displayed through processing dependant on the audio levels, here are all the images for the left image...


Stereoscopic
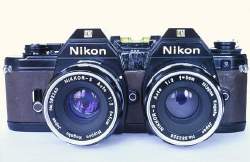
A few examples of sterescopic images we created...


We tried a few different images to attempt to understand the science, we learned that the further things were away from the camera the further the cameras needed to be apart, in the image with the light the camera was only a few centimeters apart however for the tower they would have to be much further in order to get any sense of depth.
Effect on Trellick
So we went back to shepherd's bush to try the tilt shift lense out on the tower, this is what happened... we all preferred the outcome to the previous photographs


Subscribe to:
Posts (Atom)